Mastering the art of drawing with thread opens up a new world of sewing. To sketch the fabric’s surface before we sew, we use a pencil, chalk or vanishing-ink pen. You can use templates or create your motifs. Or, you can just let go and improvise as you sew.
Sketching with thread
How to do this: Different line style calls for different approaches.
Outlines Sew slowly when stitching the main lines of the drawing. To negotiate curves, gently manipulate the fabric. It would help if you stopped often to check your needle placement. Stop sewing at the intersection of lines, then lift your presser foot and turn the fabric. Ensure the stitches are always moving forward, so lines stay sharp and clean. Sew the same lines twice or three times to create bolder lines. For stitching curves or right angles, you should set your pressure at 2 to allow for a smoother stitching experience. To turn the fabric, stop and lift your foot.
The medium pressure not only keeps the lines neat but also makes it easier for you to move the fabric. You can decrease the pressure to 0 and 1 if the lines are very small or tightly spaced. This will give you greater control over the fabric.
Use Scribbly Areas: Lower your pressure on the presser foot to 0 (we have our stitch length set at 2). You should have a firm grip on the fabric from both sides of your presser foot. You can increase your sewing speed to make it faster. Then, you can manipulate the fabric by pulling the fabric where you want them to go. This technique can also be used to add color to a shape.
Sewing on paper or cardboard
Stitching on cardboard or paper is easy and allows you to be creative. However, keep in mind, that every time your needle penetrates the material it damages the surface. Paper can tear if too many stitches are placed in a small area. It is best to use thick, quality paper or cardstock. Single-ply cardboard is best (refrain from using corrugated cardboard).
What to do: After you have figured out the settings, start to sew the decorative lines with the Sketching with Thread technique. You must keep your material moving and not let the needle remain in one place for more than a few stitches.
To stitch through unusual materials such as plastic, paper, or cork, you don’t necessarily need an industrial machine. These and many other materials can be handled by a basic home machine, provided the material is not too large for the presser foot or the needle can penetrate it.
This project can be done with universal needles. To get the perfect stitch length, width, tension, and foot pressure, you should experiment with your machine settings before you start. A specialty needle may be a better choice if you’re having trouble. Refer to the manual of your machine to determine the correct size and type of needle. Talk to a skilled salesperson about sewing machines.
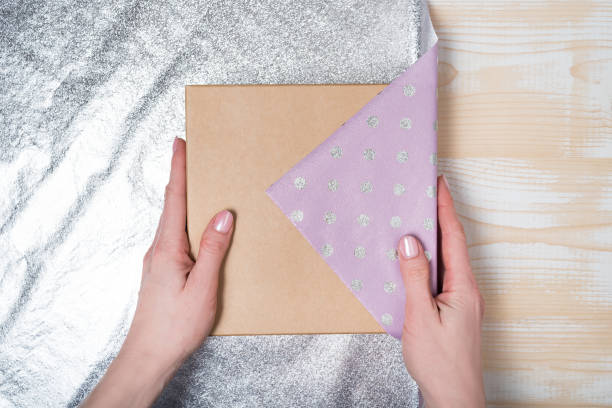
Envelope and Custom-Stitched Card
You may never want to go back to pencil and pen again after embellishing paper with thread. One great thing about paper is that the stakes are low so you can experiment with different techniques until you feel comfortable with them. This project is a wonderful keepsake that can be used for holidays, birthdays, and any other occasion.
What you’ll need?
- Cardstock
- 1 or more spools contrasting thread
Step 1: Measure, mark and cut
Measure, mark, and then cut the following pieces from the cardstock:
- Card: 5 1/2″ x 11’’
- envelope: 6 1/2″ x 11’’
- flap: 6 1/2″ x 2’’
Step 2: Create the card
Fold the card in half to align the short edges. Lightly draw a simple design on the front of your card using a sharp pencil. Use a straight stitch (ours was 2.5 inches), and then use the Sketching with Thread technique to cover your guidelines. Presser-foot pressure is sufficient to sew straight lines. Reduced pressure will allow you to sew curves.
Step 3: Fill the envelope
Align the flap’s 6 1/2″ edges with the envelope, so that the flap is 1/4 inch wider than the envelope. To secure the edges that are overlapped, zigzag (our stitch length was 2) and backstitch at each end. Fold the envelope’s opposite edge up so that it meets the seam. Sew the envelope sides together using a straight stitch. Backstitch at both ends.